Auto HDR in Windows 11 allows users to take advantage of the full capability of their displays. The Auto HDR configurations on your pc are discussed in the article with steps to enable the Auto HDR on Windows 11.
Knowing about Auto HDR
Table of Contents

Three different images of a single frame are used in the HDR imaging process also known as the High Dynamic Range to improve a picture. According to various parameters, Windows’ Auto HDR feature decides whether or not to use the feature.
When you set your machine to Auto HDR mode, you won’t have to manually enable or disable HDR settings whenever you play a game or watch a movie on your TV.
Let us know about the simple steps involved in this.
Steps to enable the Auto HDR on Windows 11
These simple steps will allow you to enable the Auto HDR on Windows 11 (on your camera)
- In the taskbar, tap on “Start”.
- In the Start menu, click on the “Settings” icon.
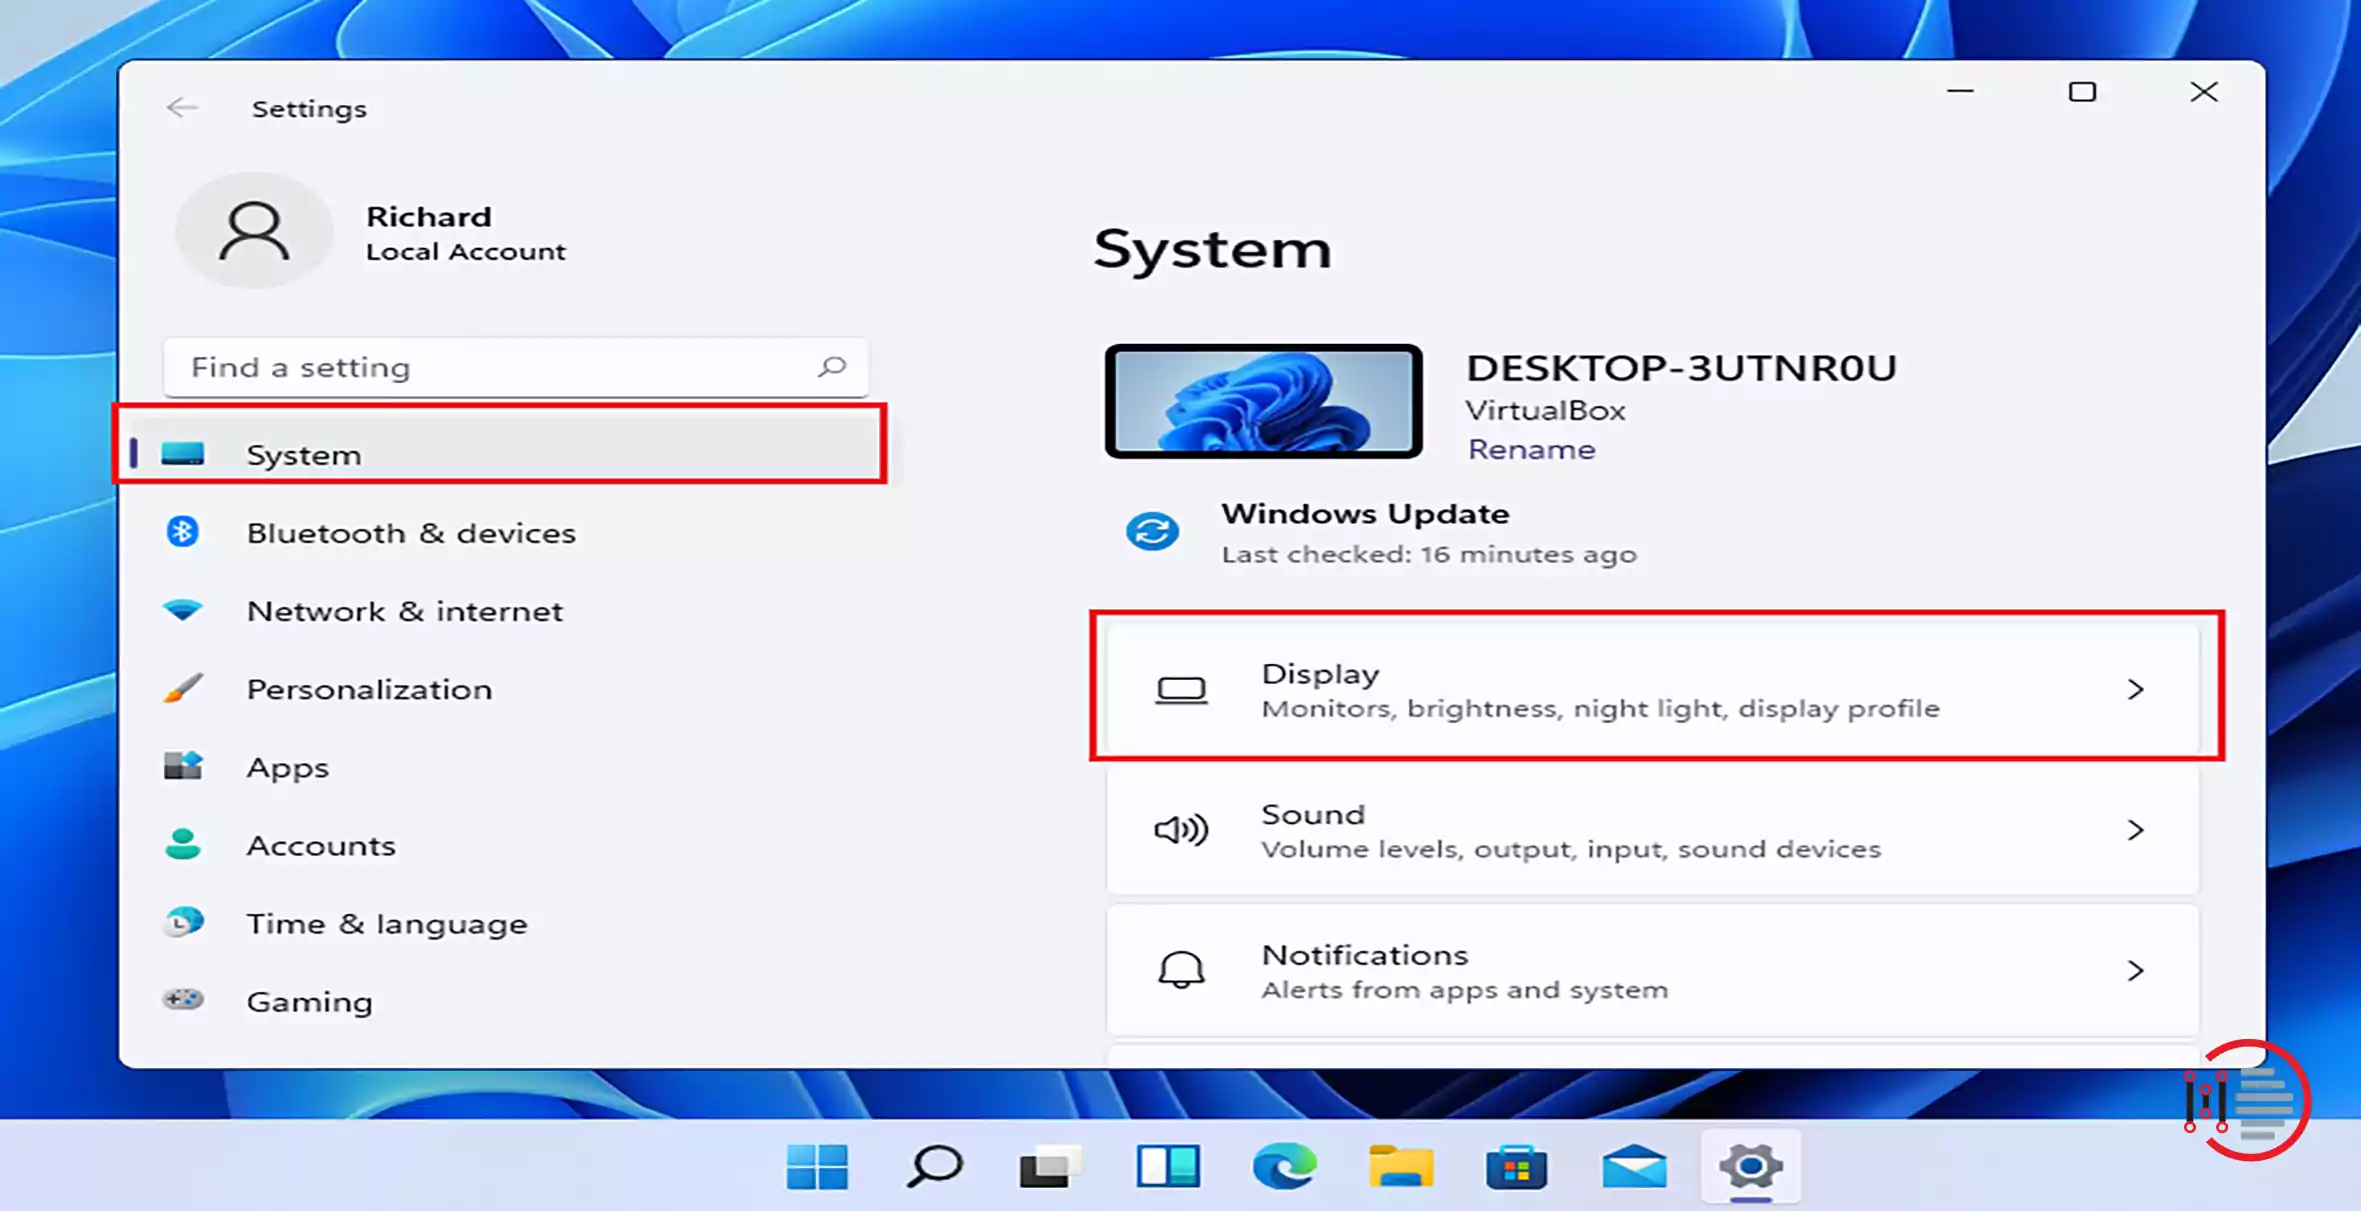
- Click on “System” to bring up a window with all of your settings.
- In the “Display” section of that same screen, tap on “Display.”
- Afterward, tap on the “HDR” button on the right-hand side to make any necessary modifications.
- Then, widen the “Display capabilities” section on the right.
- Switch “Play streaming HDR video” and “Use HDR” to “On”.
- And at last, scroll to the bottom of the page and turn on the “Auto HDR” settings.
Now close the Settings window once you’re done.
As a result, the Auto HDR mode on your computer will be enabled. The HDR mode is automatically disabled and enabled by Windows.
You may also like to read about ‘How to install Windows 11 on any non-compatible windows 10 PC‘.
Steps to Disable the Auto HDR Settings in Windows 11
You can turn off the Auto HDR mode at any time if you do not want it. Follow the steps given below to do so –
- Press Windows + I.
- As soon as you see the “Settings” window, click on “System” on the left-hand tab
- In the right-hand pane, tap on “Display”.
- On the very same side, tap on “HDR” to make changes.
- “Auto HDR” can be turned off by simply flipping the switch.
You should not turn off the ‘Use HDR’ settings, as this will disable the HDR settings on your computer’s system.
This will help stop Windows from automatically initiating HDR mode. HDR mode can be activated or deactivated manually, just as it was in Windows 10.
This was all about enabling and disabling the HDR settings in Windows 11 and the simple steps involved.
Thank you for reading the article on ‘How to enable the Auto HDR on Windows 11‘.
You may also like to read about ‘How to easily use voice typing feature in Windows 11 notepad’.

